Using the Diveplanit App – Tips and Tricks
Tip 1 – Getting photos onto your iPhone
Tip 2 – How to load the Dive Log Export file into Excel
More coming soon …
You can also see if the FAQ page has answers or to log a request for more detail!
If you don’t have the App yet click here to download Diveplanit free from the App Store.
Getting photos onto your iPhone
In order to include your dive photos in your dive log, or post them on the scubafeed, they need to be in your iPhone or iPad’s Camera Roll.
Apple used to make it easy to transfer photos from your SD card directly to an iPhone or iPad using an SD Card Adaptor for iPad and iPhone4. Unfortunately, these adaptors are no longer supported with the iPhone5 and iPhone6. Here are a few ideas for getting your pix onto an iPhone5 or 6 so you can post them to your Facebook or Google+ page easily.
Select from Diveplanit’s Gallery
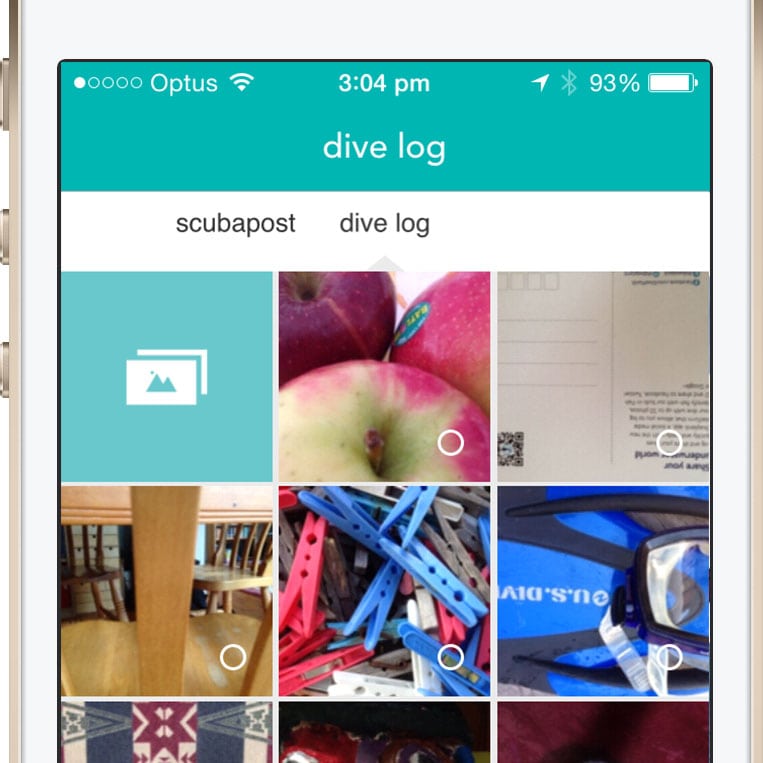
If you didn’t manage to get any photos of your own (or they’re not available yet), you can select one of Diveplanit’s Gallery images and log your dive details (NB. This function only works in Dive Log mode, not Scuba Post mode).
Use the top-left tile to select one of Diveplanit’s Gallery images.
Now you can save your Dive Log as a draft, and, should you choose, upload your own photos later; or you can publish your Dive Log it straight away, and still edit it later to add your own photos.
NB: you can only select images from the Diveplanit Gallery if you are logging your dive; not if you are simply posting a Scubapost.
Use email
If you don’t have a camera, but your dive buddy does, ask them to email you a couple of pics (who knows, you might even be in one of them). If you want to log your dive details in the meantime, simply use a Diveplanit Gallery image (see above), and save your dive log as a draft.
Take them on your iPhone directly
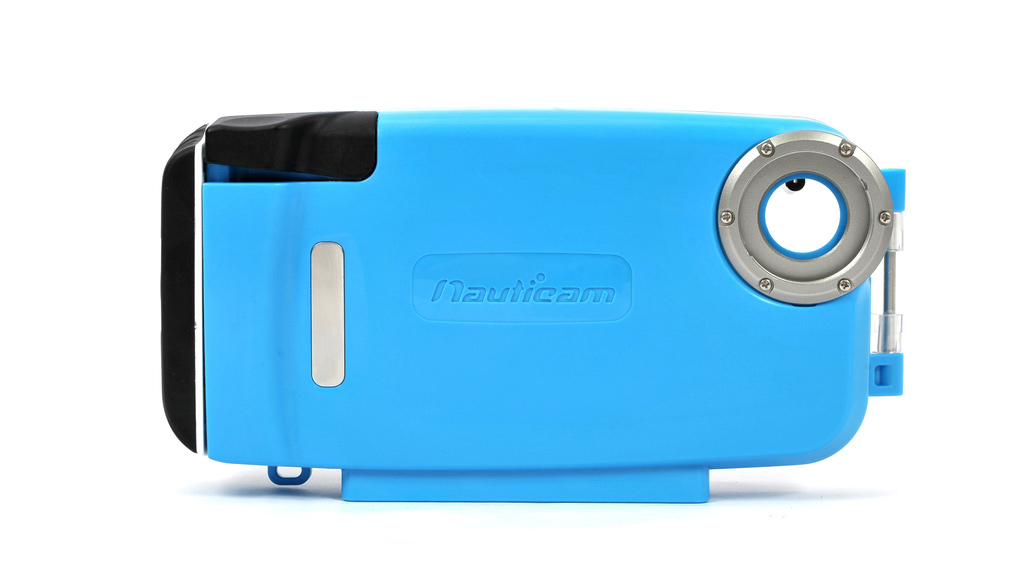
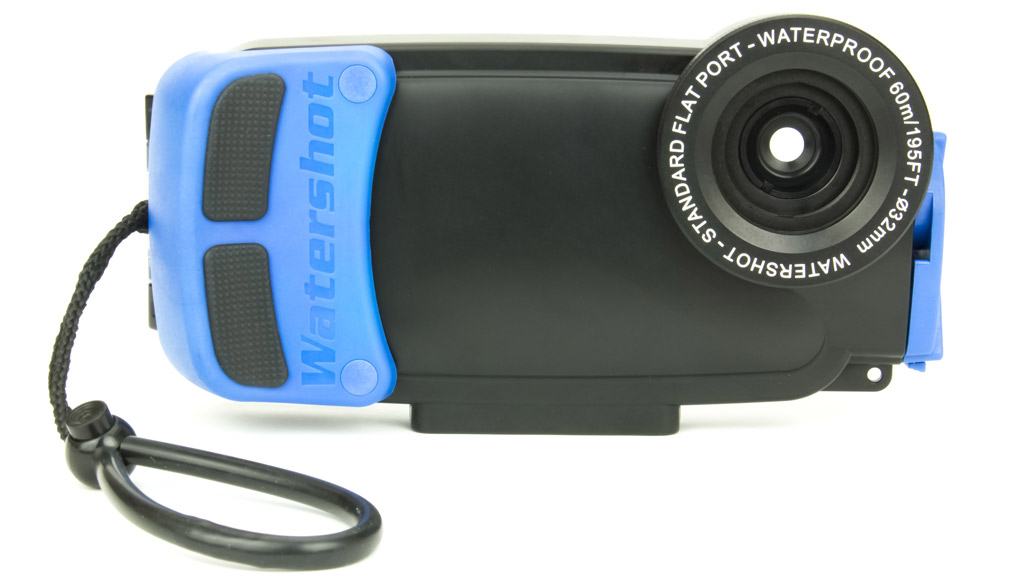
Three companies we are aware of make housing for iPhones rated to depths of about 40m.
Nauticam, a premium underwater housing brand, have housings for the iPhone4 and 5 (NA-IP4/5), and another for the iPhone6 (NA-IP6). The local distributor is the Cairns-based Scubapix.
Watershot, based in the US, have housings for the iPhone4, iPhone5, iPhone6 and even iPad. Check out their products at Watershot. They have a distributor BOBO Products in NZ.
Seashell, based in Hong Kong, have housings for the iPhone4, iPhone5 and iPhone6. Check out their products at Seashell.
All companies offer a complimentary App to ensure you can use both camera and video easily underwater. You can even get accessories, such as wide angle lenses, handles and lights.
Wireless Cameras and Action Cameras
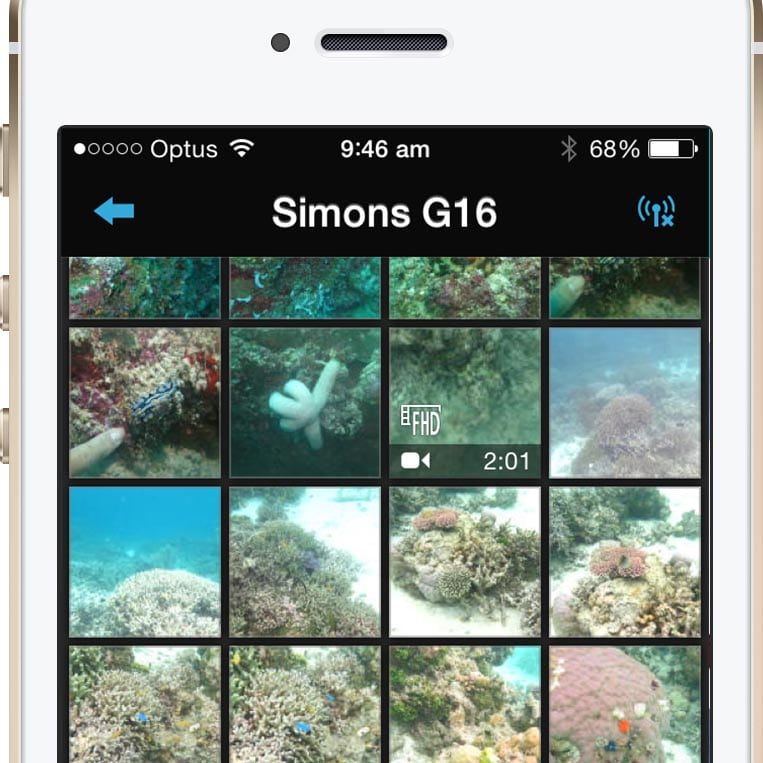
Many cameras support a WiFi interface, and most that do have an associated iPhone App that allows you to browse the images on the camera and copy them across to your mobile device.
- GoPro has the GoPro App
- Canon has CameraWindow and Canon Camera Connect
- Nikon has snapbridge
- Olympus has Olympus Image Share
- Panasonic has the Panasonic Image App
- Pentax cameras have Image Sync (by Ricoh Imaging Co Ltd)
- Sony has PlayMemories Mobile
They all work in a very similar way. As Canon is currently the most popular camera used by by underwater photographers, here is more detail on the Canon Products as an example of how they typically work.
Canon
Canon’s ‘Canon Camera Connect’ App is available free at the App Store and supports WiFi transfer of images without any adaptors or cables for the following models (currently).
Powershot: G3X, G7X, G16, G1X (Mk2), N, N2, S110, S120, S200, and many of the SX, ELPH and IXUS models.
If your Canon camera is WiFi enabled – chances are it will be supported.
You may have used Canon’s CameraWindow App in the past which is still supported and easier to use. However, if you switch to the new Canon Camera Connect App you need to reset the WiFi settings in the camera, and set it up again.
The operation is pretty straight forward: simply activate the WiFi on the camera, use iPhone Settings to switch to the WiFi channel it sets up, and use the App to browse the images on the camera. (Alternately, you can connect both devices to an existing WiFi network)
For Canon user instructions check out this link: Sending images from a camera to an iPhone.
GoPro
Anyone with a GoPro Hero3 or Hero4 is probably already connecting wirelessly to their camera. If you haven’t already got the iPhone App, start here.
Transferring files from a computer
Assuming you can transfer your images to a computer, via an SD card reader, cable or WiFi, the easiest way to transfer a few pix to your iPhone is to use email, assuming you have good WiFi or 3G/4G network connectivity.
Dropbox is an option for transferring a larger number of files into the Cloud. Once there, you can use the Dropbox iPhone App to download images into your Camera Roll and make them visible to Diveplanit.
Apple’s prescribed method of transferring photos to an iPhone or iPad is via a cable and the iTunes program. But this doesn’t work for Diveplanit (currently) because it isolates the photos in a separate folder outside the Camera Roll.
If you store all your photos in your iCloud Photo library as a matter of course these will be available across all your devices.
Using a Wireless Media Drive
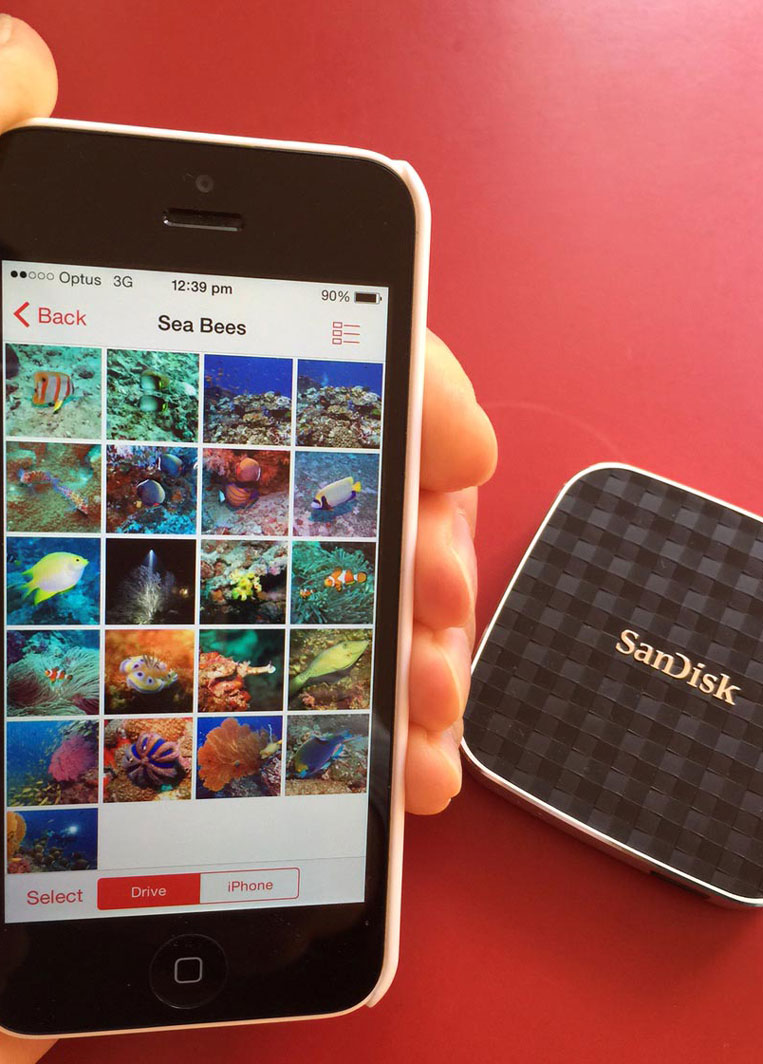
Though it sounds complex, a Wireless Media Drive is actually very easy to use. It is like a flash drive that connects to a computer via USB, but also creates its own WiFi network. Access the Media Drive’s WiFi network via Settings, browse through available photos, and download.
SanDisk Wireless Media Drive is an inexpensive example of such a product and is available in stores like Harvey Norman.
This is the perfect solution for dive centres: upload the best photos of the day, in addition to some stock images, and share. Your clients can access the photos they like.
Note: A user will need to download and install the free SanDisk Connect™ Wireless Media Drive App onto their iPhone before they can connect.
How to export your Dive Logs to an Excel document
This section explains how to get your load your dive log into Excel. You can then export it into other formats as required.
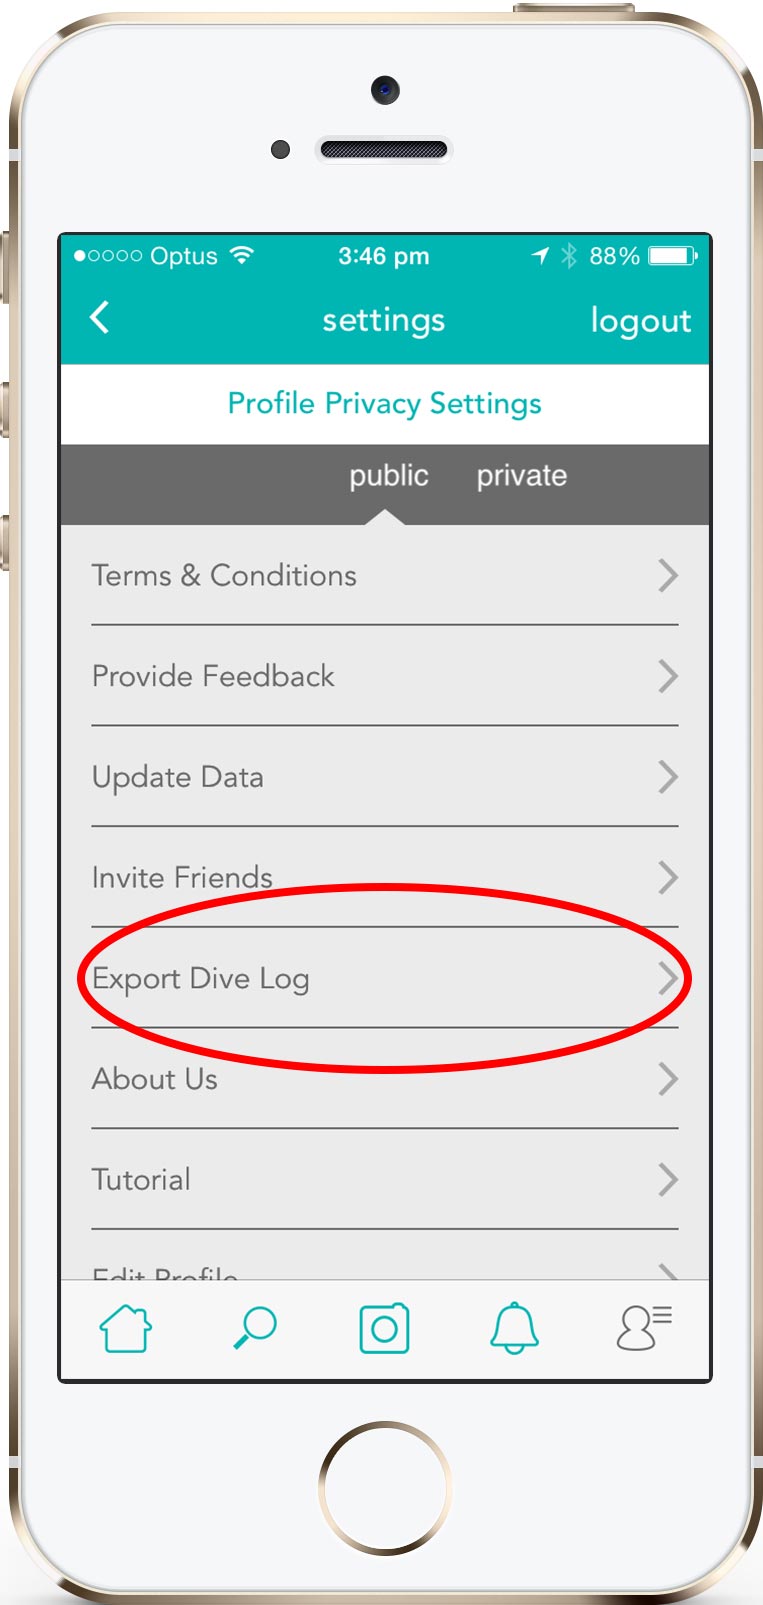
Request an export of your DiveLog in the Settings section of your Diveplanit Profile area.
A file will be emailed to you.
Down load the file ‘divelog.csv’ from your email onto your desktop and rename it: ‘divelog.txt’.
It is not actually a Comma Separated Variable file though it has an extension .csv. Because a dive log can contain commas, the “|” character has been used to separate the fields.
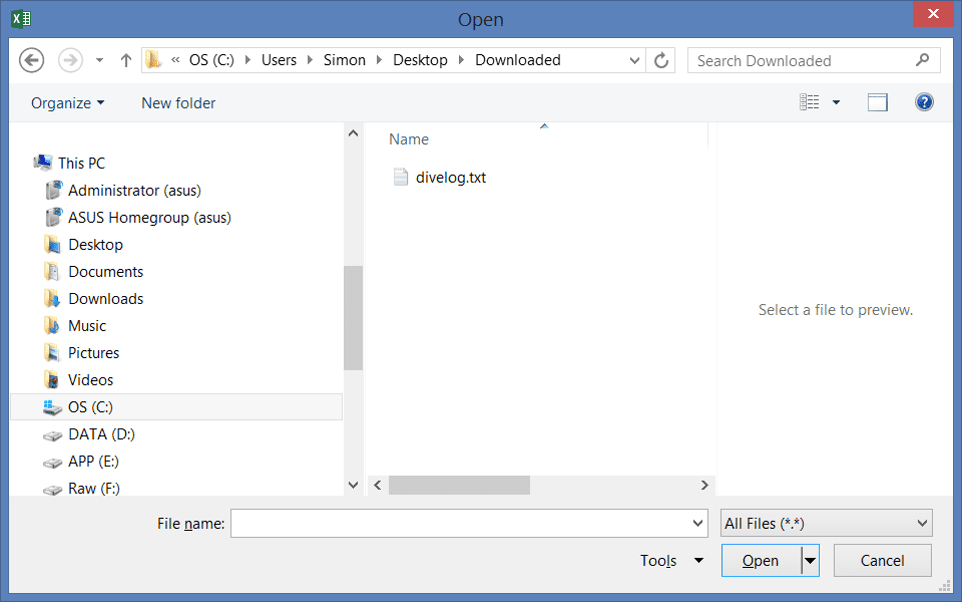
Now open Excel (or a similar program), and use the open dialog box to find the file.
Note, you may need to change the settings so it finds all files.
Select divelog.txt and open it.
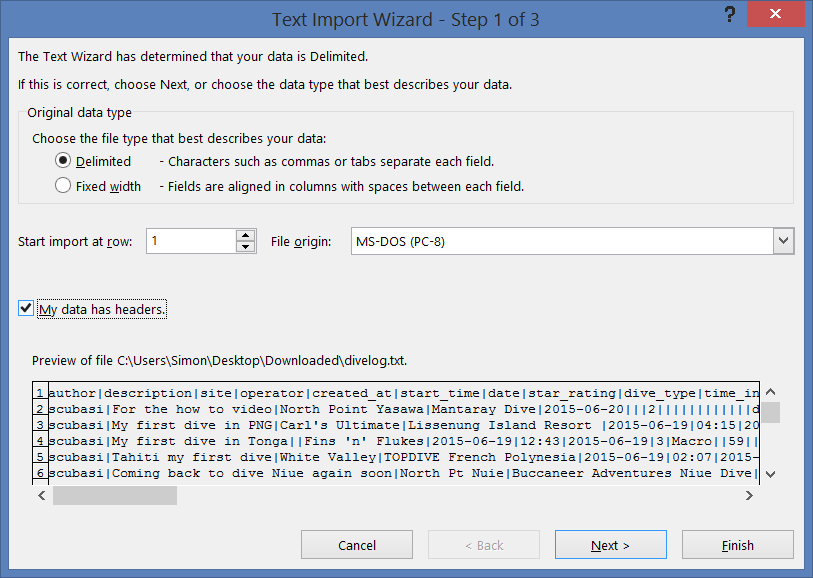
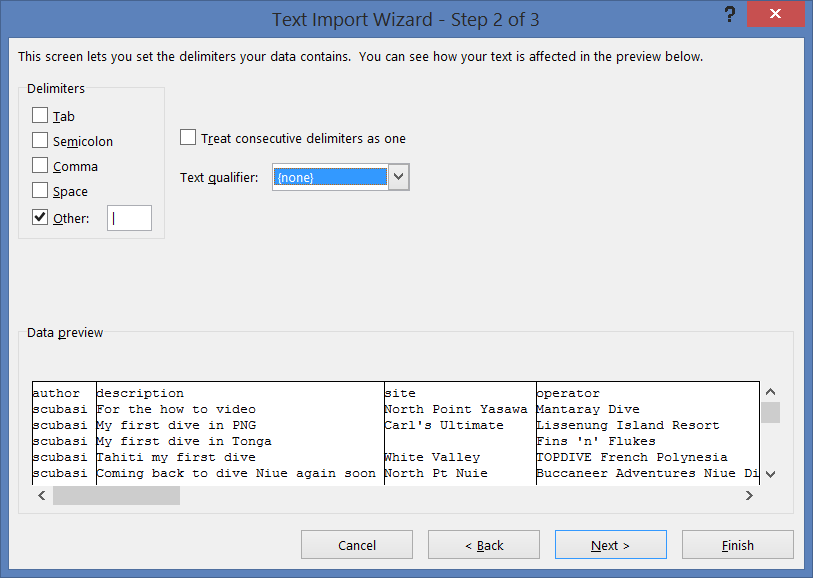
This will open the Text Import Wizard
Change the delimiter from Tab to Other and add in the “|” character.
Also, set the Text Qualifier as ‘none’.
Select [Next>]
On this screen you can change the type of each column.
It would be best to change the data format of the date columns into date format; note that they are in YMD order.
Select [Finish>] to complete the process.
Your data is now in a spreadsheet format, and you can export to other programs from there.
Note that images are not exported, as you must have had the original images of anything you included in your log in the first place. Your original images will be better quality than the ones stored in the log.

